
Smoke Alarm and Heat Detectors
We have fitted a smoke alarm in all habitable rooms, and a heat alarm in your kitchen to provide fire and smoke protection.
WARNING: NEVER DISCONNECT, INTERFERE OR REMOVE ANY SMOKE OR HEAT DETECTOR
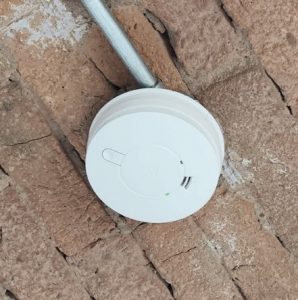
Image 1 – Typical EI146 Aico optical smoke detector
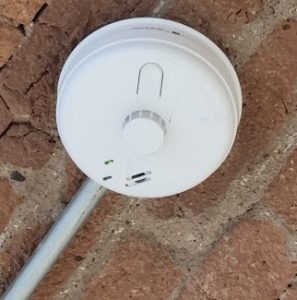
Image 2 – Typical EI144 Aico heat detector
Your optical smoke detector will quickly identify smoke which would indicate that there is a fire nearby. Your heat detector will alert you of a fire in an area where smoke detectors are not installed, e.g. in the kitchen. The device sounds an alarm if there is a sudden change or rise in ambient temperature;
How do they work
Both types of detectors are powered from your electrical consumer unit and have their own residual current device (RCD) protected circuit labelled “Smoke Detectors” or similar. Your detectors also have a 9-volt alkaline back-up battery. Eventually, you’ll need to change the battery inside each unit. Usually, you’ll hear the unit “beep” when the battery needs changing.
WARNING: MAKE SURE YOU CHECK YOUR SMOKE OR HEAT DETECTORS REGULARLY.
The operation of these alarms should be checked on a regular basis. Your smoke and heat detectors may give a beep or beeps, to alert you about a fault.
Looking After your Detectors
This section tells you how to look your heat and smoke alarms and your sprinklers around your home. You must clean your detectors and sprinklers regularly to help prevent any build-up of dust and dirt. They might look clean to the eye, but there could be dust and dirt hiding inside. If your detectors or sprinkler heads get damaged in any way, you must contact your landlord and arrange to get them replaced.
Smoke and heat detectors Dust and dirt can have an effect on how they work and as a result, there could be a delay in the alarm sounding or it could lead to false alarms.
Cleaning Your Detectors
To clean your detectors, do the following steps:
WARNING: DON’T USE ANY CLEANING AGENTS, BLEACHES, DETERGENTS OR POLISHES, INCLUDING THOSE IN AEROSOL CANS.
Using a microfibre cloth, wipe the all the outside of the detector. Using the flat open end of your vacuum cleaner, gently vacuum along the sides of your detector to remove any dust, dirt, insects and cobwebs etc. Make sure the air vents are well cleaned for good air flow. Using a clean soft lint free cloth dampened with warm water, clean the cover by wiping it thoroughly.
Testing Your Detectors
WARNING: IF THE HEAT ALARM SOUNDS WHEN IT’S NOT BEING TESTED, IT IS SENSING A TEMPERATURE OF 57°C OR ABOVE. THE ALARM NEEDS YOUR IMMEDIATE ATTENTION AND ACTION. EVACUATE YOUR APARTMENT IMMEDIATELY.
You must test your detectors weekly and always after coming back from holiday or when the apartment has been empty for a few days. Test all detectors by doing the following:
WARNING: STAND AT ARM’S LENGTH FROM THE HEAT ALARM WHEN TESTING. THE ALARM SOUNDER IS LOUD TO ALERT YOU TO AN EMERGENCY AND CAN BE HARMFUL TO YOUR HEARING.
– Check the TEST / HUSH or Push-To-Test button. If the green LED above the test button is ON, the heat alarm has got power
– Firmly press and hold the TEST / Hush or Push-To-Test button for at least five (5) seconds. The heat alarm will sound 3 long beeps, pause, 3 longs beeps, repeating for up to 10 seconds after the TEST / Hush or Push-To-Test button is released.